Templates
The Templates table offers the capability to add, modify, delete templates, and upload template files. Templates will be utilized in future processing. To enable a template to function correctly, it is essential to compose it using the proper syntax. Once you have completed these tasks, proceed to the additional documentation.
⚠️ Warning: Currently work in progress lots of things can change
Managing templates
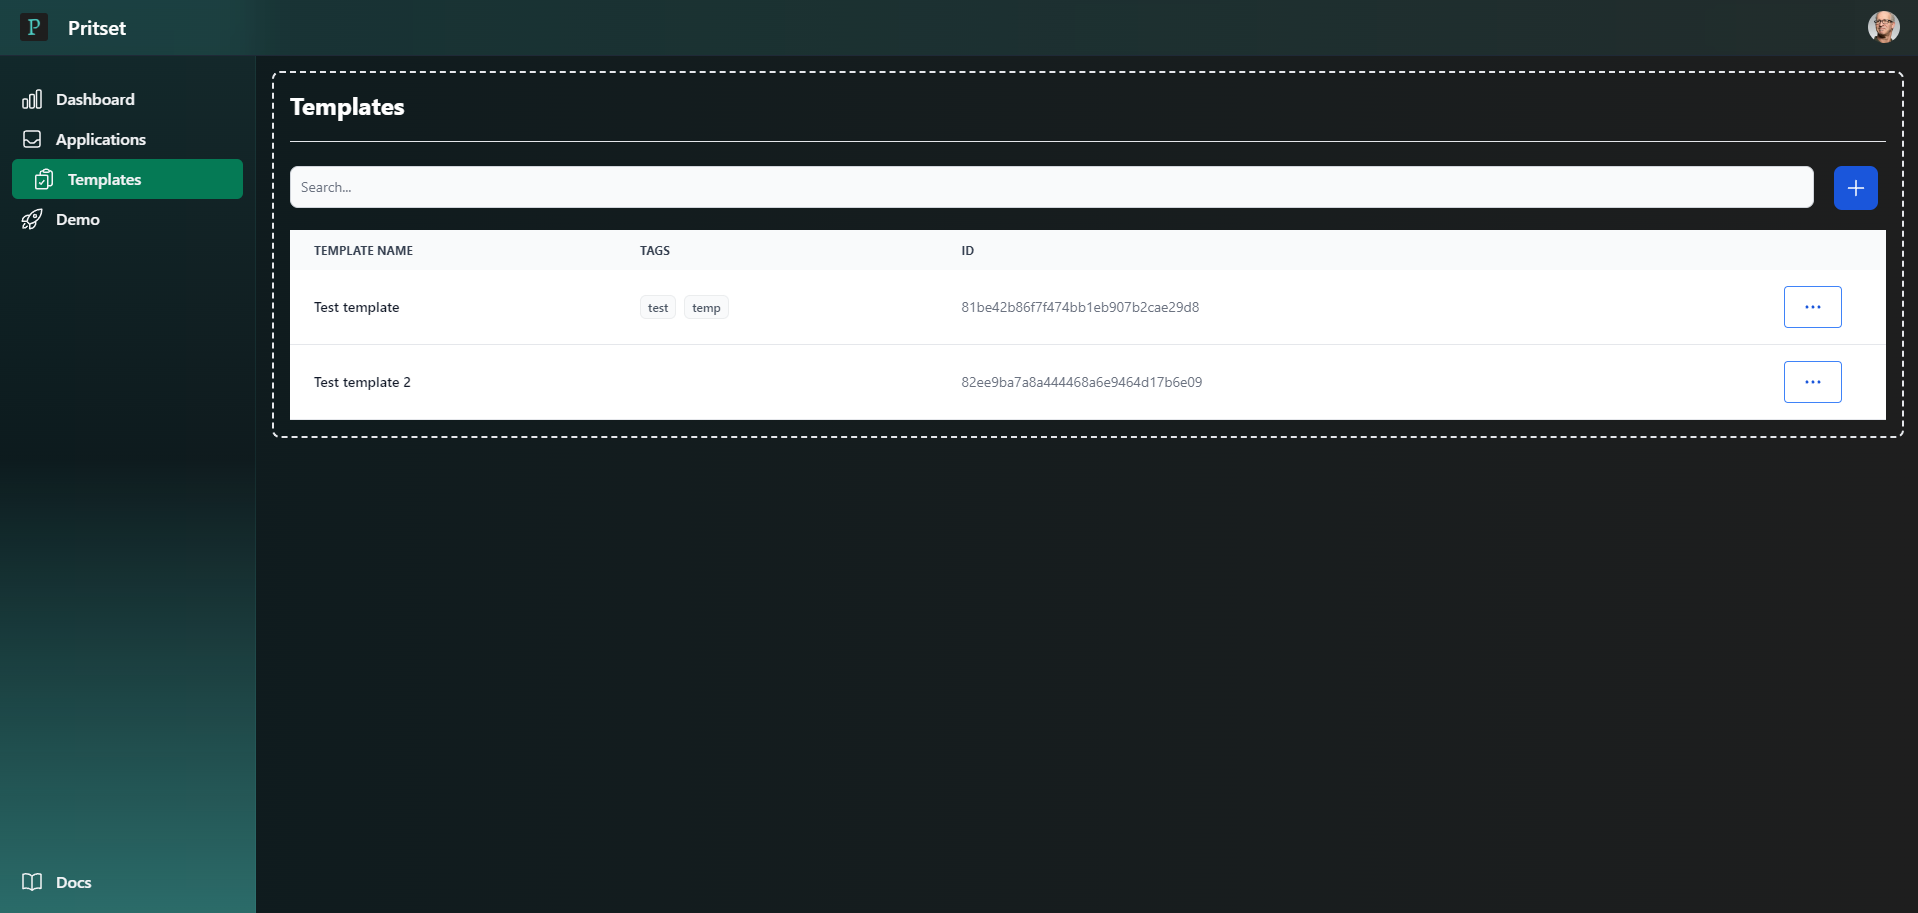
First go to template tab. On sidebar to the left click on Templates and you will see a templates table.

Add template
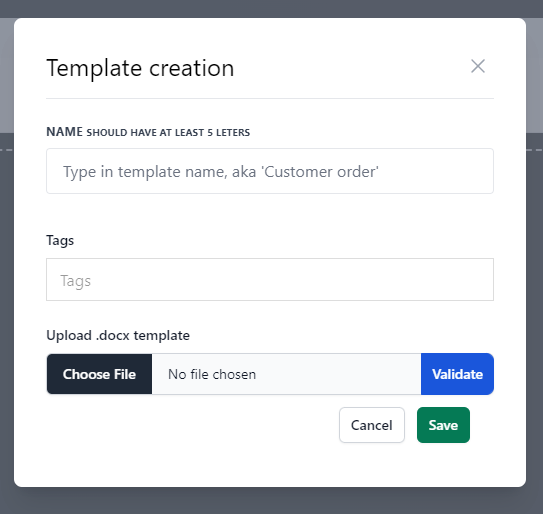
To add new template you should click on the blue plus right to the search bar. Then you will see a modal.

In the name input you should input more then 5 characters (required).
Tags will be used in the future (optional).
In the next input place a .docx file template you already created (required).
You can validate template file.
After you input values click Save. Modal will close and new application will appear.
Edit template
To edit template click on the tree dot in the row with template you want to edit and press Edit.
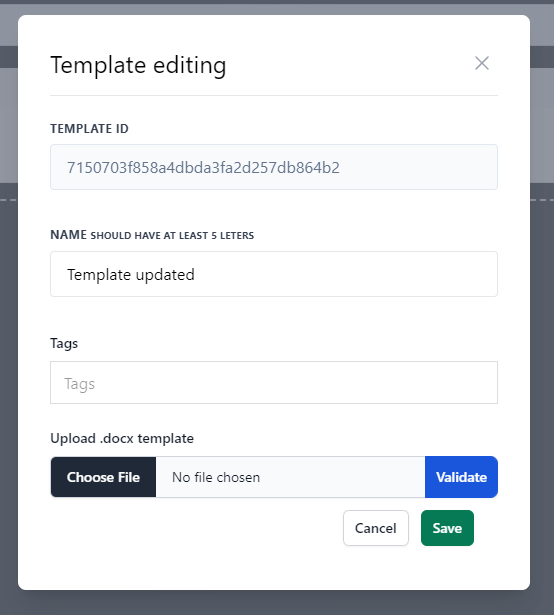
Modal will be open with template data.

Template Id is a unique id of the current template. Not editable.
Name. You can adjust the name. In the Name input you should input more then 5 characters.
Tags. You can adjust the tags.
File input. You can update template file. Optional.
You can validate template file.
After you input values click Save. Modal will close and new application will appear.
Delete template
To delete template click on the tree dot in the row with template you want to edit and press Delete. After just confirm your choice.
Download template
You can download template by clicking on tree dot in the row with template and then press Download.
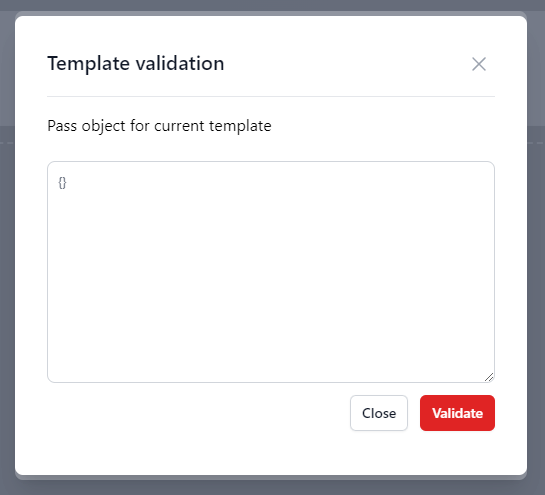
Validate template file
You can validate template file by selecting file on the creating/editing modal, then click on Validate to the right from the file input. It will open validation modal, where you can pass an object to test template file
